Meaningful Use Settings


  • If you are performing setup for a user other than yourself, use the User Settings in the System Administration
  • If you are performing setup for yourself, use My Account.

Introduction

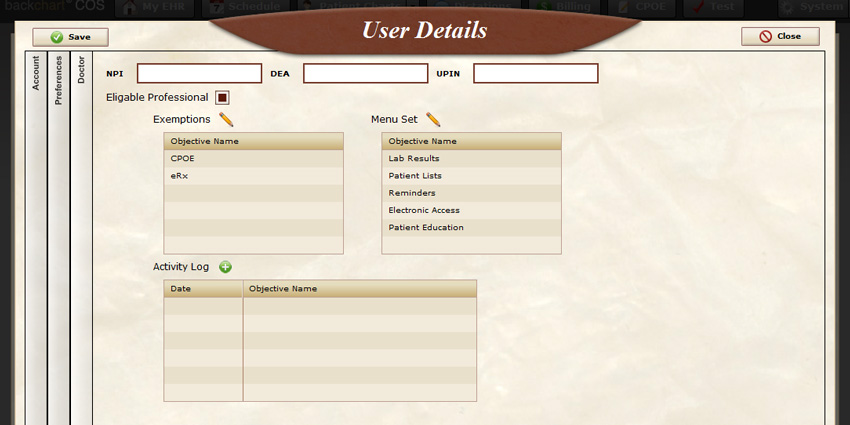
The Meaningful Use dashboard widget is available to those users who are set up as doctors.  When you first login, you may see the Meaningful Use widget on the dashboard which will be empty or you may not see it at all.  There is some setup that needs to be performed before it will be visible or display your Meaningful Use statistics.

Set the Doctor as an Eligible Provider
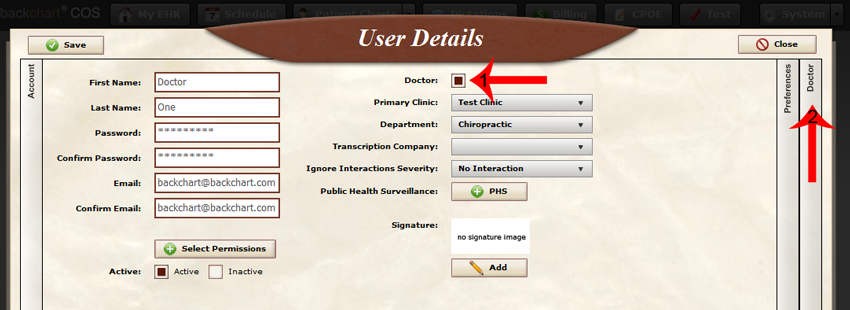
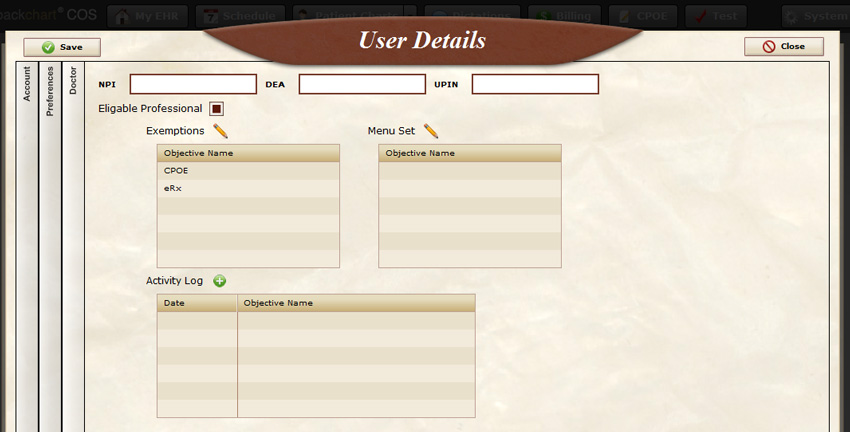
To signify that the doctor is eligible to receive the Medicare incentive, click the Eligible Professional check box (Eligibility Information)

With the EP check box checked, the Meaningful Use setting will appear.

Note Any Applicable Exemptions

The first area is the Exemptions. This allows you to tell the system which Meaningful Use items you are exempt from.  Click on the pencil icon to bring up the Edit Exemptions window.
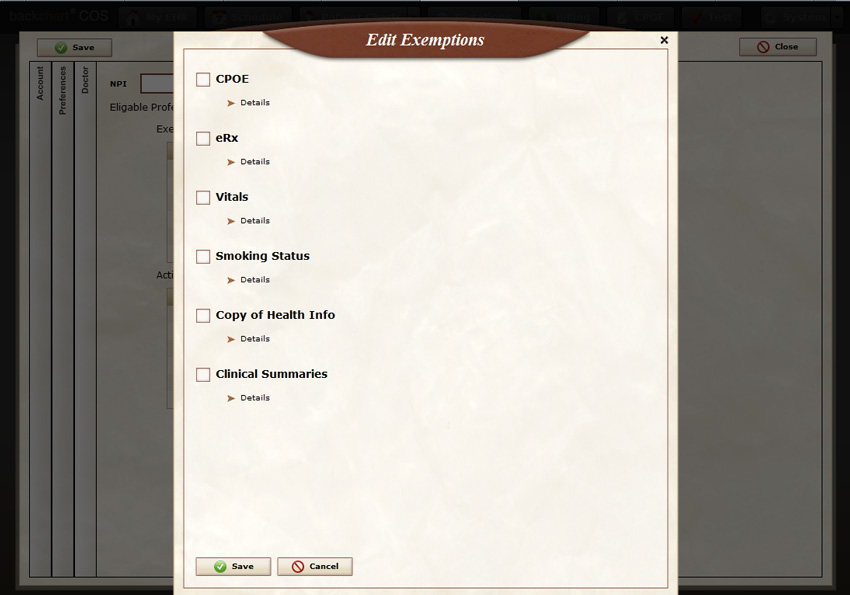
You can click on the arrow to the left of Details to see the measure information. Check the boxes next to any measure(s) you are excluded from.
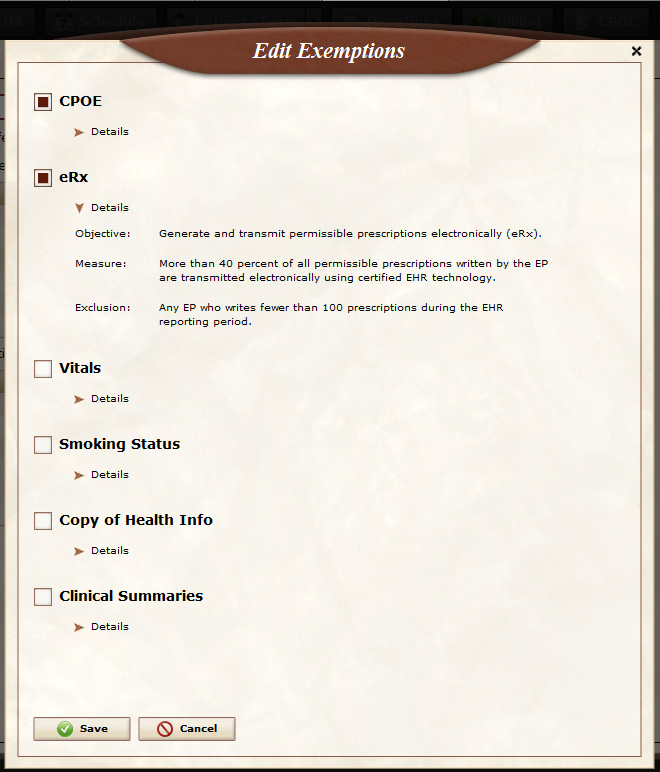
After clicking save, the exemptions you selected will be displayed in the list. You can always make changes to these by clicking the pencil icon.
 Choose Your Menu Set Items

The next area is the Menu Set. This allows you to tell the system which Menu Set items you are going to report on.  Click on the pencil icon to bring up the Menu Set window.
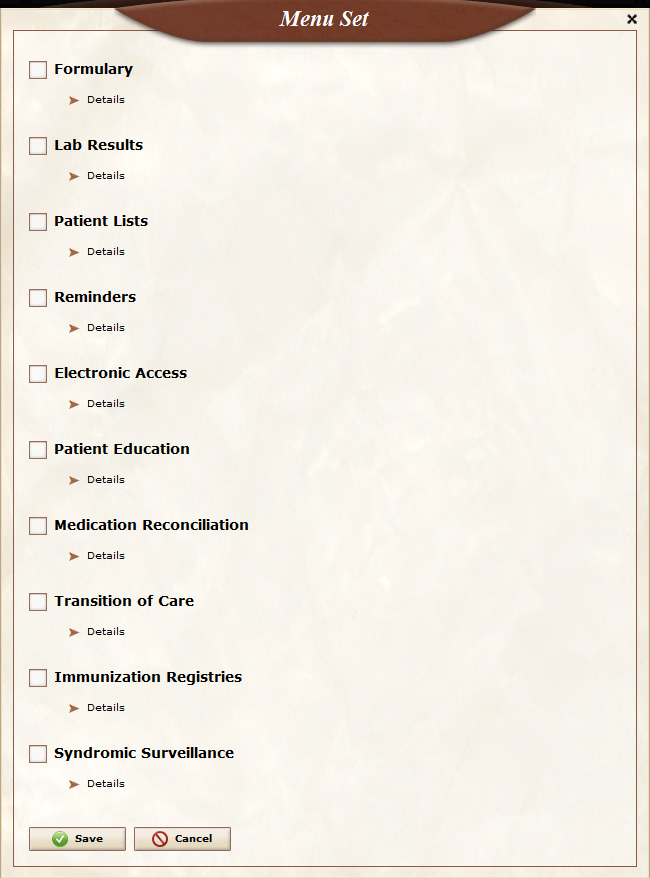
Medicare would like you to pick 5 items out of this list of 10 (our recommendations).  You can click on the arrow to the left of Details to see the measure information.  Check the boxes next to the items that you would like to demonstrate compliance with.

Click save to save your choices. You will see your Menu Set selections appear in the list.
Log Compliance With One Time Events

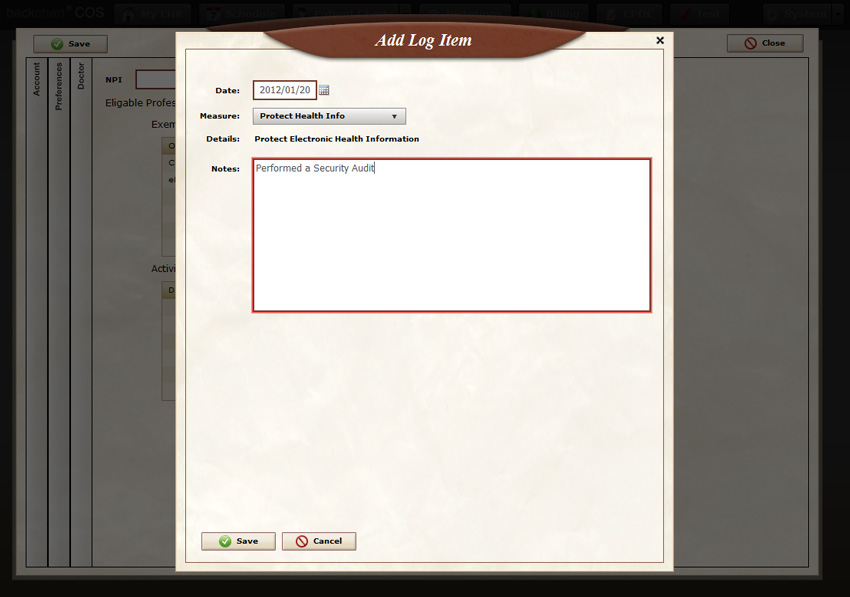
The final area is the Activity Log.  This area will allow you to document the one time occurrence measures.  For example, Core item 15: Protect Electronic Health Information, requires you to perform a security audit during the reporting period.  You can record that you have completed a Security Audit here.

Note: You may not have any items to log at this time.  Come back to document items when you complete them.
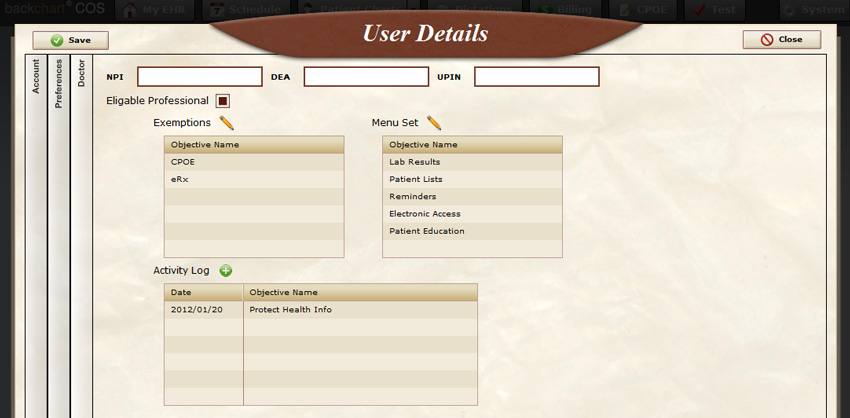
Your log items will be listed in the Activity Log list:
The Meaningful Use Widget

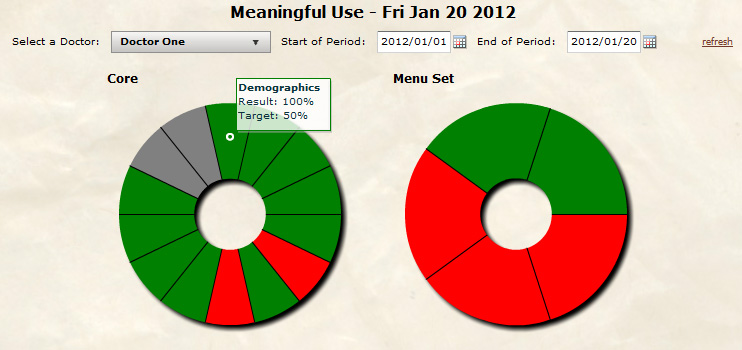
At this point, you can click save and return to your dashboard (My EHR).  Select the start date that you would like to begin tracking from* and click refresh.  You will see a graphical representation of your Meaningful Use statistics.  Green shading indicates that you are in compliance with that measure, yellow shading indicates that you are slightly in compliance with that measure, grey shading indicates that you have set an exclusion for that measure, and red shading indicates that you are out of compliance with that measure.  Hovering over each section will display: The measure name, your statistics, and what it takes to be in compliance with that measure.

*If you are past your first year of Meaningful Use, this will be Jan 1.
See also:

Patient Portal – Staff Access

User Setup

To setup staff access there are two steps that need to be taken.
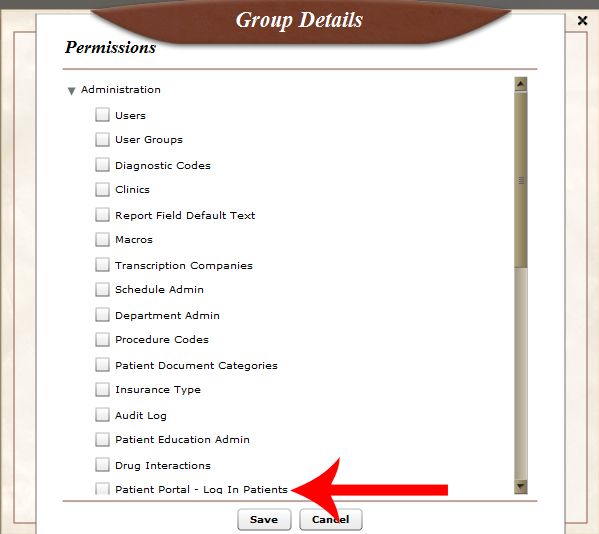
First, you need to give the user the permission to log patients into the portal. You can either assign the permission to the user or users individually, or if you are using user groups, you can assign the permission to the entire group. The permission can be found under the administration group:

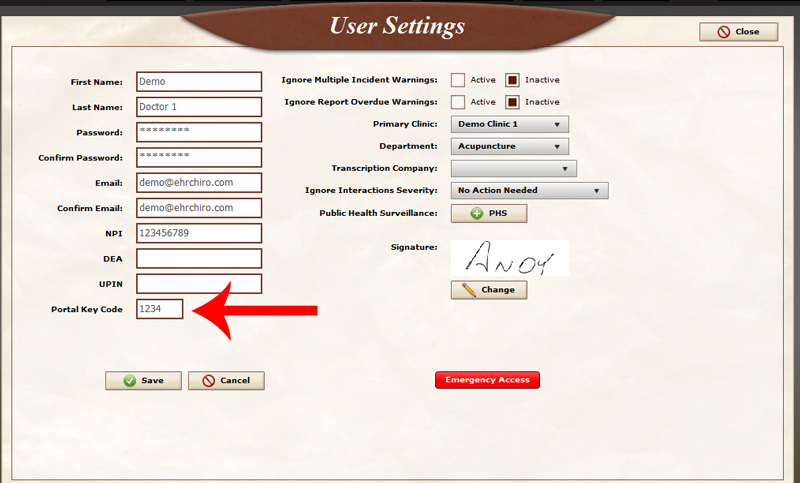
Once the user has the correct permission, they need to choose and enter a key code in their “My Account” settings:
Staff can use this key code to quickly unlock the kiosk/tablet and get it ready for the next patient.


Using the Portal

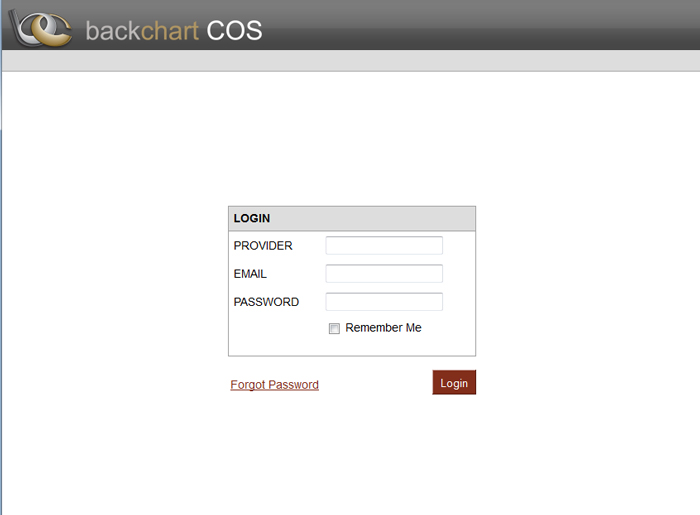
To access the patient portal go to http://portal.backchart.com in your web browser.  You will be asked to login.  Enter your BackChart® COS login email and password.  You will also need to enter your company’s provider name.  If you do not know your provider name, contact your system administrator or BackChart® COS account representative.
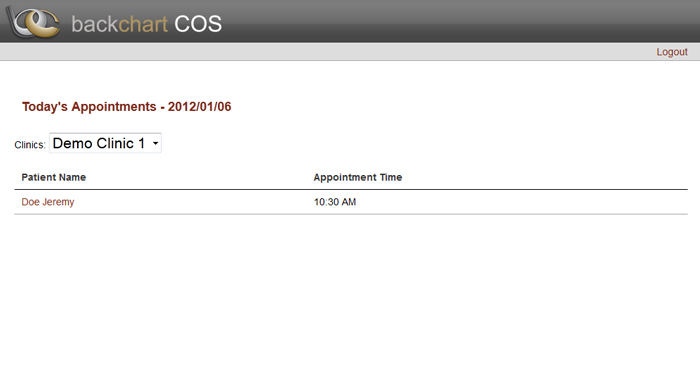
When you login, you will be presented with a list of today’s scheduled appointments.  By clicking on the patient’s name, you will log into that patient’s portal.

When the patient is done and logs out, you will be brought back to a login screen. In order to save time, the system will ask for your key code. This makes loging back in quicker since you don’t have to enter your full login information.

Enabling Patient Portal access

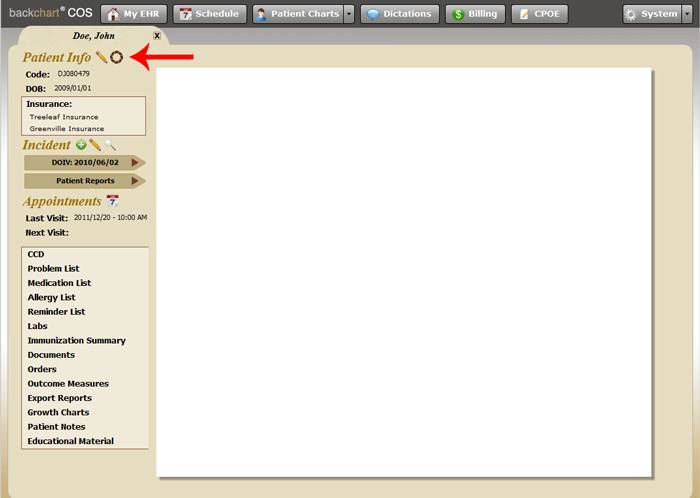
To enable a Patient’s access to their Patient Portal, click on the Patient Portal icon located on the patient chart.

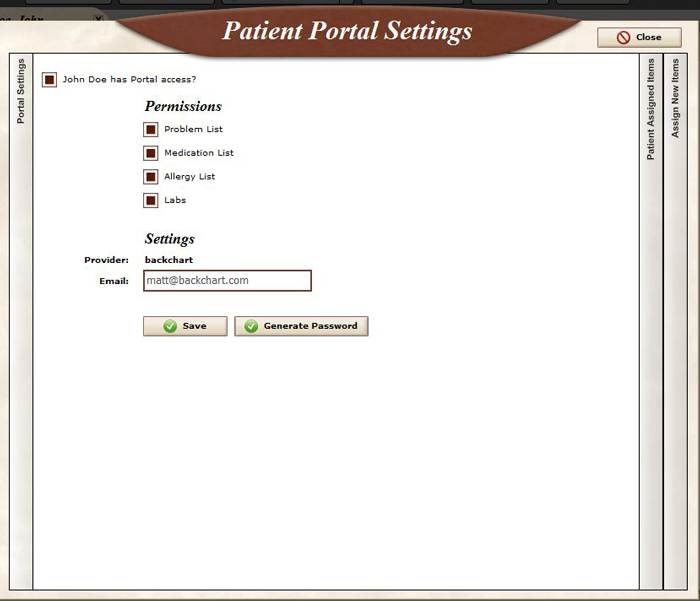
The Patient Portal Settings window allows you to enable access to the Patient Portal
The first checkbox enables access for the patient. You can then choose what health information they can see by checking the appropriate boxes for their Problem List, Medication List, Medication Allergy List, and Lab Results. Enter the patient’s email address and click generate password. The patient will receive an email asking them to complete their account creation by choosing a password.

Vital Signs

Objective: Record and chart changes in the following vital signs:

  • (A) Height
  • (B) Weight
  • (C) Blood pressure
  • (D) Calculate and display body mass index (BMI)
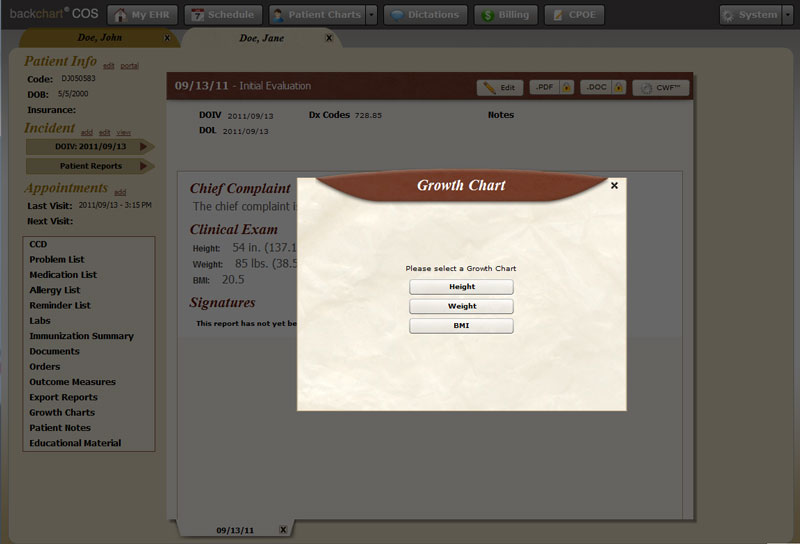
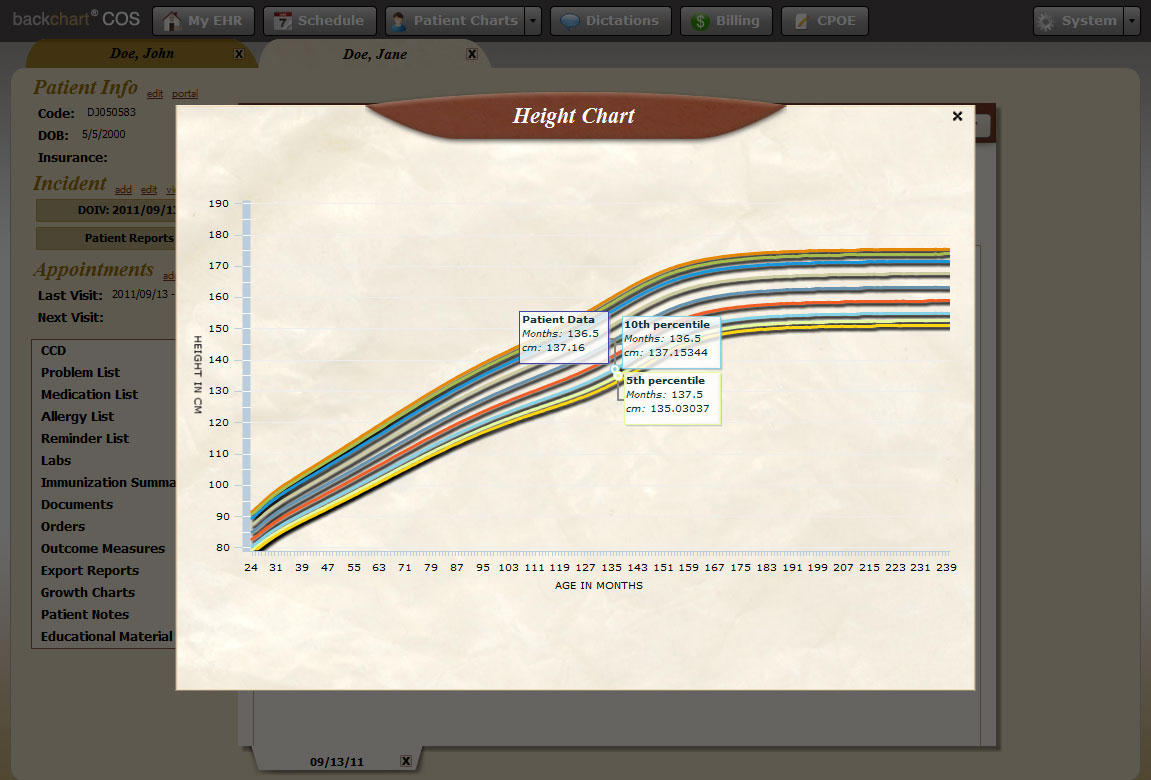
  • (E) Plot and display growth charts for children 2-20 years, including BMI

Measure: For more than 50 percent of all unique patients age 2 and over seen by the EP, height, weight, and blood pressure are recorded as structured data.
Exclusion: Any EP who either see no patients 2 years or older, or who believes that all three vital signs of height, weight, and blood pressure of their patients have no relevance to their scope of practice.
Full Details: PDF

See video below on Vital Signs:


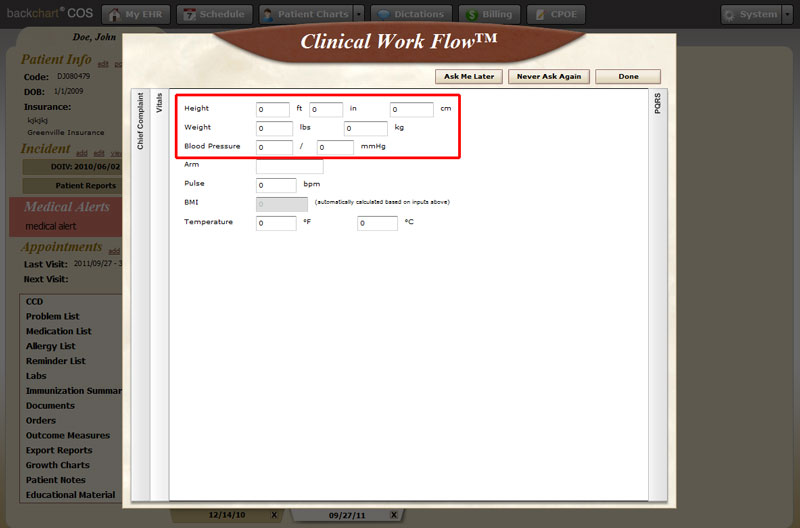
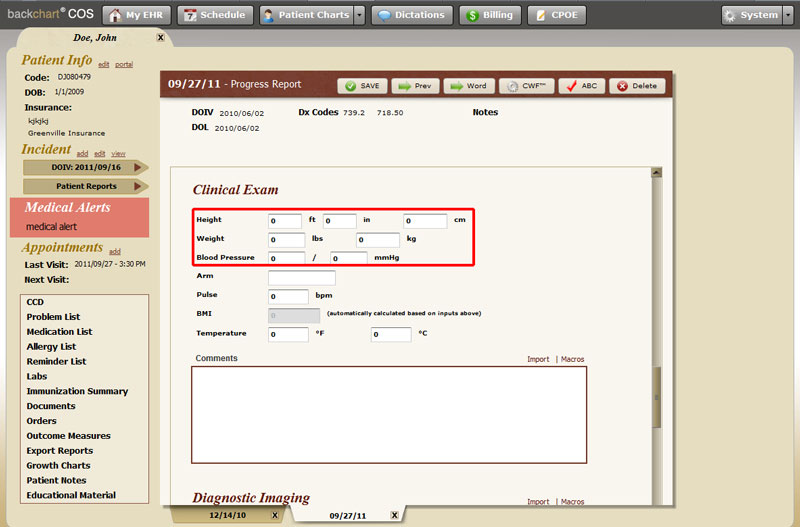
See the slides below for the locations of vital signs in BackChart® COS:

Clinical Decision Support

Objective: Implement one clinical decision support rule relevant to specialty or high clinical priority along with the ability to track compliance with that rule.
Measure: Implement on clinical decision support rule.
Exclusion: No exclusion.
Full Details: PDF

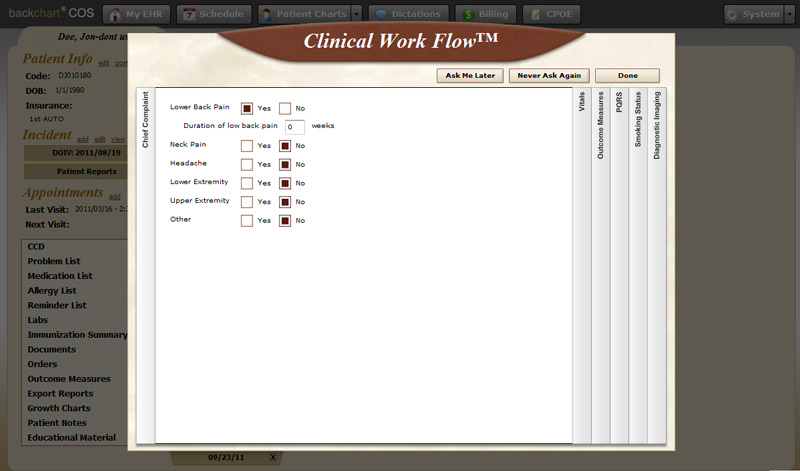
BackChart® COS has clinical decision support incorporated into the Clinical Work Flow™.   The support tool begins when you select the chief complaint.  See slide below:

After the chief complaint has been selected, the Diagnostic Imaging tab will appear. See below:
After you have entered in the correct information and click ‘view recommendations’ the clinical decision window will appear.  See below:

Demonstrating Meaningful Use – Smoking Status

Objective: Record smoking status for patients 13 years old or older.
Measure: More than 50 percent of all unique patients 13 years old or older seen by the EP have smoking status recorded as structured data.
Exclusion: Any EP who sees no patients 13 years or older.
Full Details: PDF

See video below on Smoking Status:


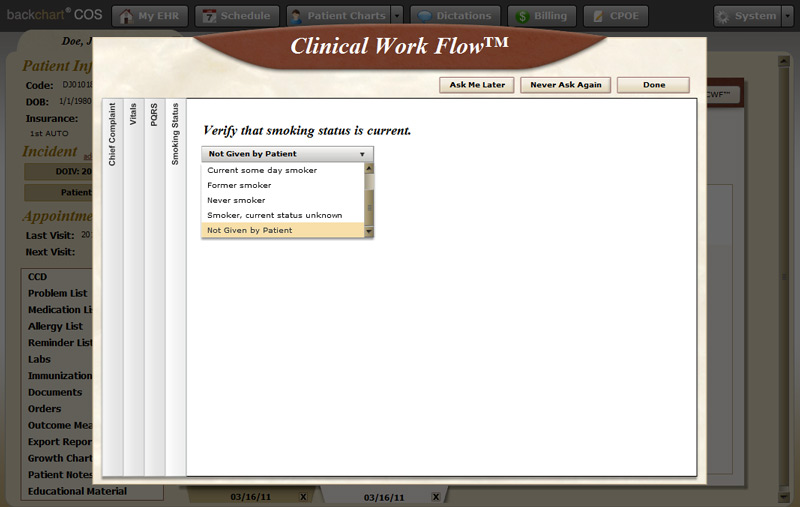
See the slides below for the locations of the smoking status in BackChart® COS:

Demonstrating Meaningful Use – Record Demographics

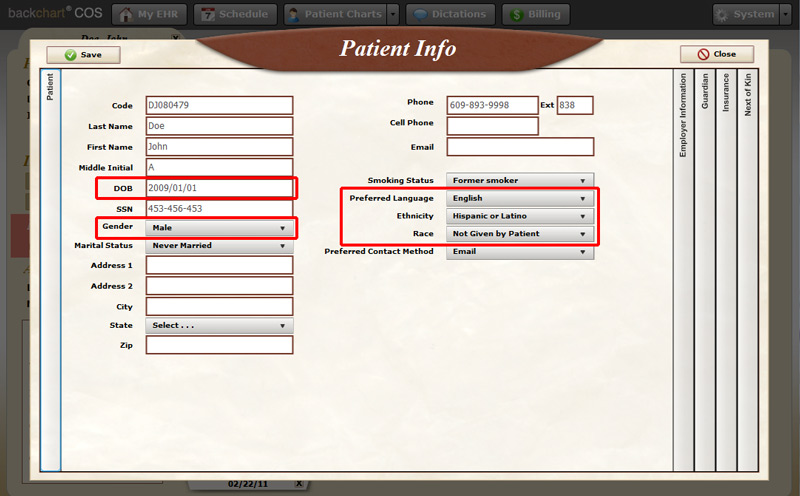
Objective: Record all of the following demographics:

  • (A) Preferred language
  • (B) Gender
  • (C) Race
  • (D) Ethnicity
  • (E) Date of birth

Measure: More than 50 percent of all unique patients seen by the EP have demographics recorded as structured data.
Exclusion: No exclusion.
Full Details: PDF

See video below on demographics:

Below is a screen shot that shows you the locations of the demographics in the patient info section of BackChart® COS.

Demonstrating Meaningful Use – Problem List

Objective: Maintain an up-to-date problem list of current and active diagnoses.
Measure: More than 80 percent of all unique patients seen by the EP have at least one entry or an indication that no problems are known for the patient recorded as structured data.
Exclusion: No exclusion.
Full Details: PDF

See video below on the problem list:


The problem list contains a list of past and present patient diagnoses. It can include both problems that you diagnose, as well as, diagnoses from another provider.

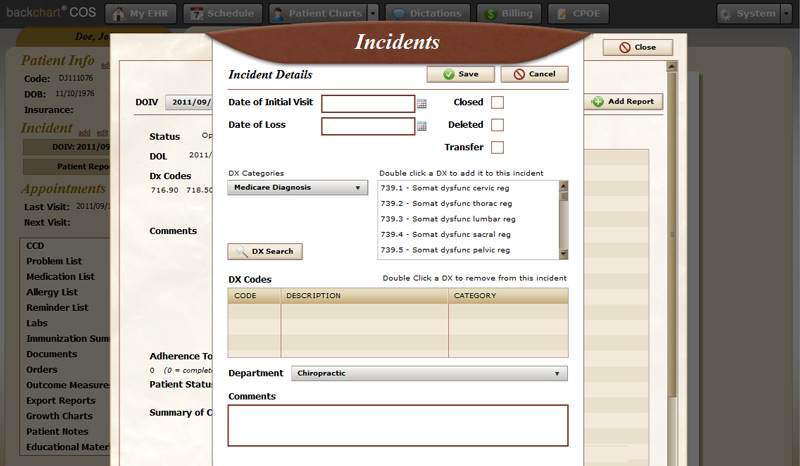
When you enter a diagnosis for the patient’s incident, you are given the opportunity to include that diagnosis in the patient’s problem list.

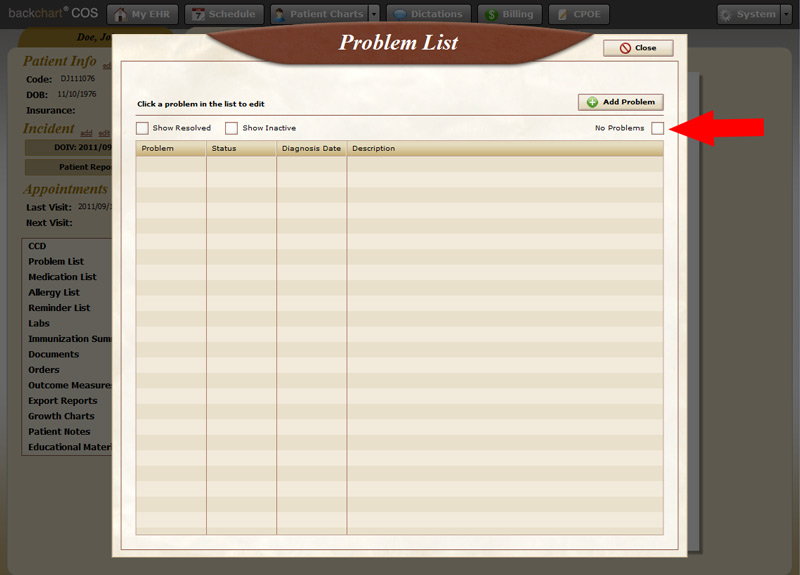
If you are treating a patient that has no problems or has no active problems, you can record this by checking the box “No Problems”.

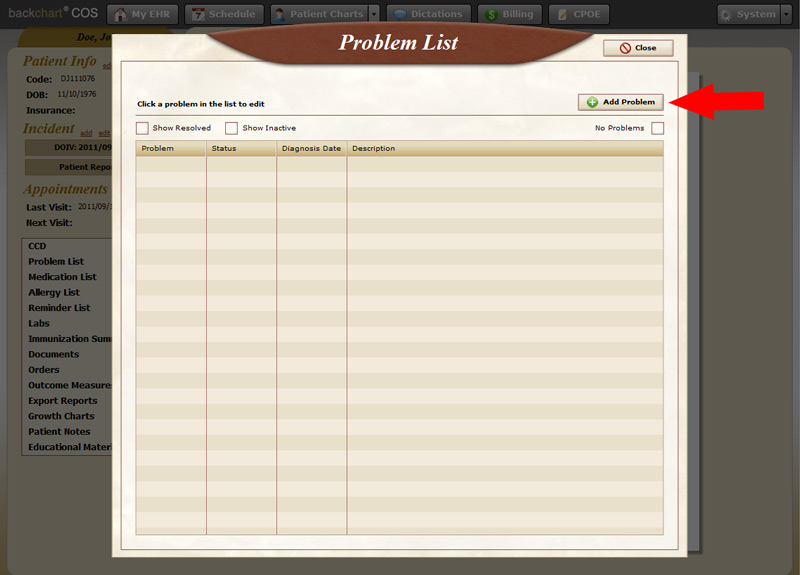
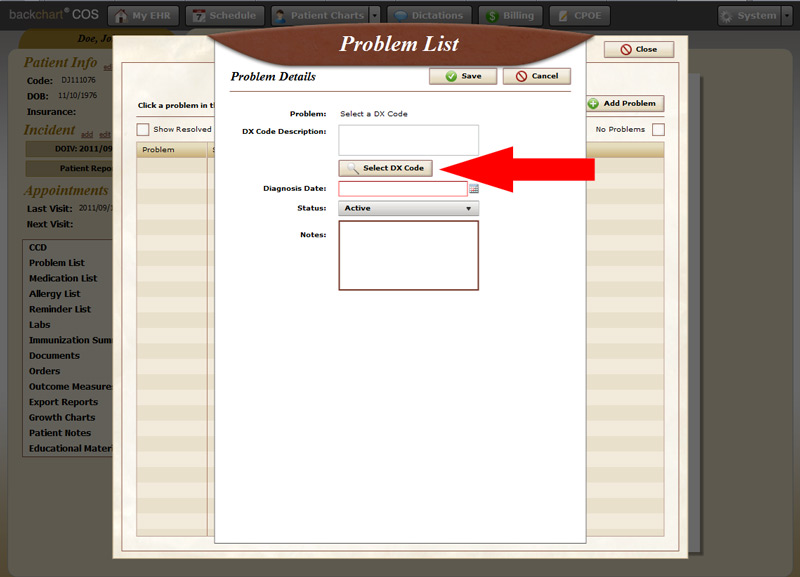
If you need to add a problem, for instance if the patient was referred to you and had been previously diagnosed with Hypertension, click the “Add Problem” button.

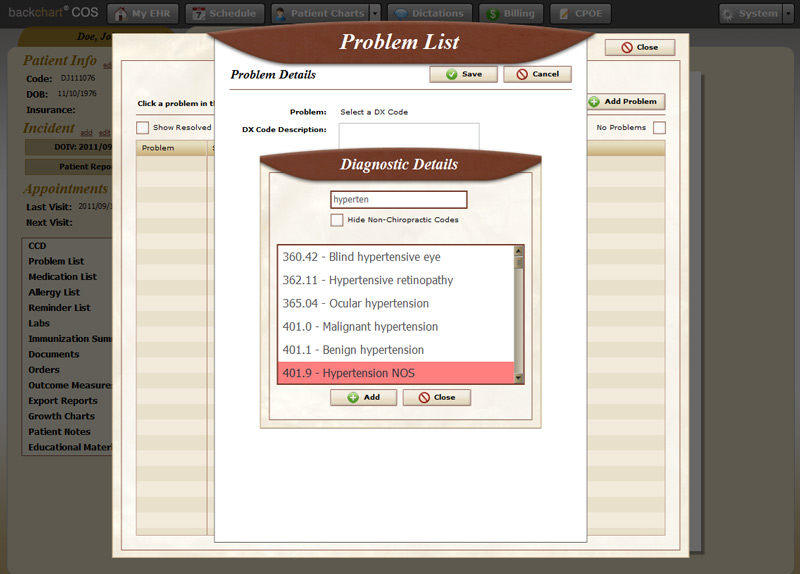
The first step is to search for the applicable diagnosis code.  Click “Search Dx Code” to bring up the search window.

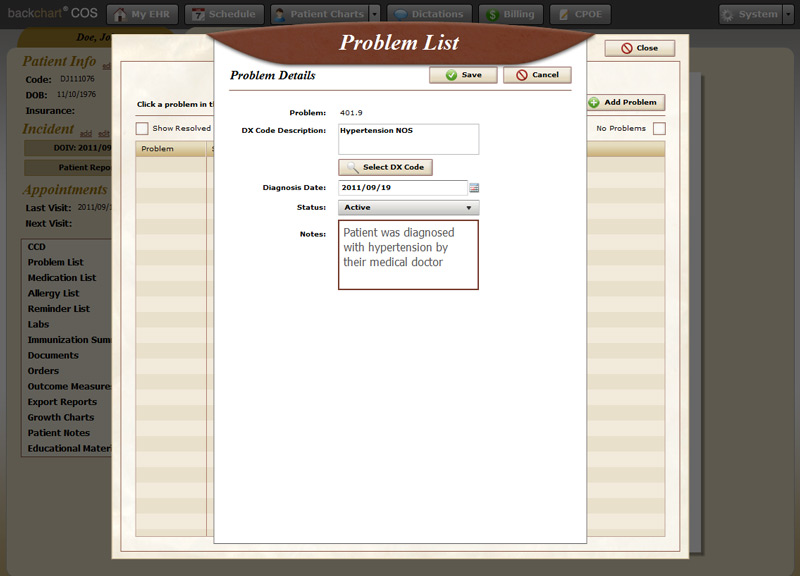
Once you have found the diagnosis you are looking for click on it and click the add button.You can also add additional information about the problem, such as: the date the problem was diagnosed, whether it is an active diagnosis or not, and you can include a note about the problem (If this problem was not diagnosed by your facility, you could include a note regarding who the diagnosing physician was).